
10 Proven Ways to Keep Indoor Herb Plants Thriving

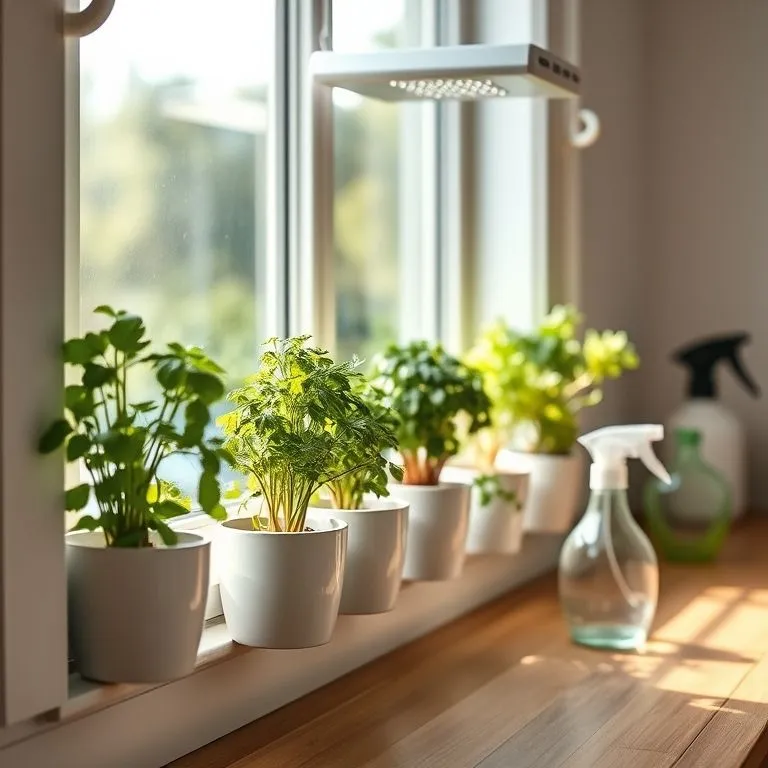
Table of Contents
Introduction:
Dreaming of fresh basil by the sink but getting spindly stems, yellow leaves, or soggy soil? With a few proven tweaks, your indoor herb plants can become a year-round source of flavor—even in small spaces or low-light kitchens.
In plain English, we’ll tackle the big questions that hold growers back: What is the best herb to grow indoors? Can herbs be grown indoors year round? What herbs should not be grown indoors? And what is the mother of all herbs? Then we’ll put answers into action with ten practical habits anyone can follow.
Whether you’re Growing herbs indoors for beginners or upgrading a windowsill setup, this guide shows you how to use an indoor herb garden with grow light when daylight is limited, pick right-sized indoor herb pots that prevent root stress, and start strong with a curated list of the 10 best herbs to grow indoors. Along the way, you’ll understand the exact light, water, soil, and airflow your indoor herb plants need to thrive—not just survive.
You’ll learn how to:
- Choose resilient varieties for your space and taste
- Design a simple light plan (window or grow light) that prevents legginess
- Water and feed on a schedule that avoids bitterness and root rot
- Set up containers and drainage that keep roots oxygenated and productive
Let’s dive into the ten proven ways to get consistent harvests from indoor herb plants—minus the guesswork, plus the aroma.
Indoor herb plants for beginners: set up for success
If you’re new to growing green on your windowsill, start simple, think small, and plan your harvests. Indoor herb plants thrive when you match the right variety to your light, choose breathable indoor herb pots, and commit to quick weekly care. This is especially true for Growing herbs indoors for beginners—your first wins build momentum.
Use this quick setup to stack the odds in your favor:
- Light: A bright south- or west-facing window works; if yours is dim, an Indoor herb garden with grow light makes results predictable.
- Pots: 4–6 inch breathable pots with drainage keep roots happy. Group herbs with similar needs.
- Plant choices: Favor compact, cut-and-come-again herbs that bounce back after harvest.
- Routine: Water by feel, trim lightly and often, and refresh soil on a schedule.
Small, consistent steps lead to healthy indoor herb plants that actually end up on your plate.
Indoor herb plants: pick compact, high-yield varieties
The fastest way to succeed is choosing herbs that fit your space and your schedule. Ask: Will this plant stay neat, produce steadily, and taste great when harvested young?
Winning traits for beginners:
- Compact growth: Stays short and bushy under indoor conditions.
- Quick regrowth: “Cut-and-come-again” performance after harvesting.
- Tolerant of imperfect light: Not fussy about slight shade or shorter days.
- Strong flavor in small leaves: Big payoff from small harvests.
Smart picks and cultivars
- Basil (bush/Greek types): ‘Spicy Globe’ or ‘Pluto’ stay tidy and branch well.
- Chives: Standard or garlic chives; thin often, they rebound quickly.
- Thyme: ‘German’ or ‘French’ thyme is dense, aromatic, and easy to shape.
- Oregano: ‘Greek’ oregano is flavorful and compact.
- Parsley: ‘Moss Curled’ stays tidy; ‘Italian Flat-Leaf’ has bold flavor.
- Mint: Peppermint or spearmint in its own pot to contain vigor.
- Sage: ‘Berggarten’ is a naturally compact sage with broad, tasty leaves.
- Lemon Balm: Shade-tolerant, fast to rebound after trimming.
Pro tip: Place two or three of the same herb in a row of indoor herb pots and stagger your harvests. While one plant rests, the others keep you supplied—this is how indoor herb plants deliver continuous flavor.
What is the best herb to grow indoors?
If you want the easiest win, start with chives. They’re forgiving, snip-ready in weeks, and happy in moderate light. Close contenders:
- Mint: Thrives with occasional neglect, just give it its own pot.
- Thyme: Compact, aromatic, and excellent for sunny sills.
- Basil (bush types): Rewarding under bright light or a small grow light.
Best-by-scenario
- Low-maintenance: Chives
- Lower light: Mint or lemon balm
- Bright window or grow light: Basil (bush), thyme, oregano
- Fast flavor for cooks: Parsley (flat-leaf), chives
10 best herbs to grow indoors (quick, reliable choices)
These are the 10 best herbs to grow indoors when you want reliable, kitchen-ready results. Most thrive in bright windows; basil, rosemary, and sage do even better in an Indoor herb garden with grow light.
- Chives — Cut small clumps weekly; they regrow fast and handle variable light.
- Bush/Greek Basil — Compact, fragrant, and prolific with strong light.
- Thyme — Dense, low-growing, and intensely flavorful in small sprigs.
- Mint (Peppermint/Spearmint) — Vigorous; keep isolated to its own pot.
- Oregano (Greek) — Bold flavor; prune often to keep it bushy.
- Parsley (Flat or Curled) — Steady producer; harvest outer stems first.
- Lemon Balm — Lemon-zest aroma; tolerant of partial shade.
- Sage (‘Berggarten’) — Broad leaves, slow but dependable under good light.
- Cilantro (‘Calypso’ or other slow-bolt) — Short-lived but productive when sown in batches.
- Rosemary (dwarf types like ‘Blue Boy’) — Needs strong light and lean watering; wonderfully aromatic.
Care shortcuts for all ten:
- Harvest little and often (never more than one-third at a time).
- Let the top inch of soil dry before watering again.
- Rotate pots weekly to prevent lopsided growth.
With the right choices, these indoor herb plants stay compact, flavorful, and ready for your next meal.
What herbs should not be grown indoors?
You can grow almost anything with enough light and space, but some herbs fight the typical indoor setup. For most beginners, skip these (or know the extra effort required):
- Dill — Tall, taprooted, and short-lived indoors; wants deep containers and strong sun. Try: chervil or parsley for delicate notes.
- Fennel — Needs depth and consistent outdoor sun for bulbs. Try: celery leaf for a similar savory lift.
- Bay Laurel — Slow grower, prone to scale indoors. Try: thyme or sage for woody, savory flavors.
- Lavender — Needs intense light and lean, dry air that most homes lack. Try: rosemary (dwarf) under a bright light.
- Lemongrass — Quickly outgrows small spaces and drinks lots of light. Try: lemon balm for citrusy fragrance.
- Standard cilantro — Bolts quickly in warm rooms. Try: slow-bolt varieties like ‘Calypso’ and sow every 3–4 weeks.
Choosing herbs that match indoor limits is the most overlooked step for Growing herbs indoors for beginners—and the difference between sparse stems and lush indoor herb plants.
What is the mother of all herbs?
The phrase isn’t universal, so you’ll hear different answers:
- European folklore: Mugwort (Artemisia vulgaris) is often nicknamed “mother of herbs.”
- Mediterranean tradition: Oregano is sometimes celebrated as a foundational “mother” herb of the cuisine.
- Ayurveda: Holy basil (tulsi) is revered as the “queen of herbs.”
For your kitchen, pick the “mother” that serves your cooking style—and the one that grows happily in your light. That’s what matters most for thriving indoor herb plants.

Light matters: keep indoor herb plants thriving
Light is the engine of flavor. Without enough, indoor herb plants stretch, taste mild, and slow to a crawl. With the right setup, they stay compact, aromatic, and harvest-ready. If you’re Growing herbs indoors for beginners, dialing in light early will save you weeks of guesswork—and give your kitchen a steady supply of bright, fresh leaves.
Know the signs before problems snowball:
- Too little light: long, weak stems, pale leaves, small new growth, “reaching” toward the window.
- Too much light/heat: crisped leaf edges, drooping mid-day, dry soil every 24 hours.
- Just right: sturdy stems, tight internodes, deep color, frequent new shoots—classic thriving indoor herb plants.
Indoor herb garden with grow light: how to choose and place
A good grow light replaces inconsistent daylight with predictable results. Here’s how to pick one and position it for maximum flavor.
- Spectrum and style
- Choose full-spectrum white LEDs (4000–5000K) for natural color and even growth.
- Bar or panel fixtures give more uniform coverage than single goosenecks.
- Brightness and coverage
- Aim for 20–40 real watts of LED per 2–3 sq ft of herbs or a target PPFD of 150–300 µmol/m²/s at leaf level.
- Keep the light 6–12 inches above the canopy; raise or lower to keep leaves cool to the touch.
- Timing
- Use a timer: 12–16 hours on, 8–12 hours off. Most culinary herbs are happy at 14 hours.
- Placement
- Center the beam over the whole tray of indoor herb pots for even growth.
- Add a white or reflective backdrop (poster board or mylar) behind plants to recycle stray light.
- Safety and care
- Keep fixtures dry, use a drip tray, and plug into a GFCI outlet near sinks.
- Check heat by placing your hand at leaf height; if it’s hot for your skin, it’s hot for indoor herb plants.
Pro tip: If you’re starting small, one 24–36″ bar light on a timer is a low-fuss, high-impact upgrade that keeps indoor herb plants compact and flavorful.
Growing herbs indoors without sunlight: LED strategies that work
No sunny window? No problem. You can still get lush growth with a simple, repeatable plan.
- Choose the right LED
- Full-spectrum, 4000–5000K, with a dimmer if possible for fine-tuning.
- Set a dependable schedule
- 14 hours on, 10 off is a solid default for most kitchen herbs.
- Hit the intensity sweet spot
- Target 150–250 µmol/m²/s at the leaves. No meter? Use a phone lux app: ~10,000–15,000 lux at canopy roughly matches that intensity under white LEDs.
- Arrange by height
- Put taller herbs to the sides and shorter ones in the center, or elevate short pots so every plant gets similar light.
- Create a mini “light box”
- Reflective or white surfaces on two sides boost efficiency, especially helpful when Growing herbs indoors without sunlight.
- Monitor and adjust
- If stems stretch, lower or brighten the light; if leaves curl or crisp, raise or dim it.
Result: consistent, restaurant-quality sprigs without relying on the weather.
Dial in light duration and intensity by herb type
Different herbs have different appetites for light. Use these targets as a starting point, then adjust based on growth.
- High-light lovers (basil, rosemary, thyme)
- PPFD: 200–300 µmol/m²/s
- Hours/day: 14–16
- Notes: Keep close to the center of the light; prune often to maintain a low, bushy shape.
- Medium-light herbs (parsley, oregano, sage)
- PPFD: 150–200 µmol/m²/s
- Hours/day: 12–14
- Notes: Rotate weekly to avoid leaning; steady moisture, not soggy.
- More tolerant herbs (mint, chives, lemon balm)
- PPFD: 100–150 µmol/m²/s
- Hours/day: 12–14
- Notes: Great for edges or slightly shaded spots on the shelf.
Quick check: sturdy stems and tight spacing between leaves mean the light is right. If your indoor herb plants look lanky, increase intensity a bit or extend the photoperiod by 1–2 hours.
Rotate and reposition plants to prevent legginess
Even lighting keeps growth compact and flavorful. A few tiny habits go a long way.
- Quarter-turn routine
- Rotate each pot 90° every 2–3 days so all sides get equal light.
- Canopy control
- Raise the fixture as plants grow to maintain the same distance; trim tall stems to keep a flat, even canopy.
- Smart grouping
- Keep similar-height herbs together; place high-light lovers under the brightest zone and tolerant herbs at the edges.
- Seasonal tweaks
- In winter, move setups closer to the fixture or add an extra hour on the timer; in summer, back off intensity if leaves feel warm at midday.
Weekly 2-minute checklist:
- Turn pots, raise or lower the light, and swap positions for any plant that’s leaning.
- Snip a few sprigs while you’re there—regular harvesting helps indoor herb plants stay bushy and productive.
Water precisely to avoid stress and root rot
More herbs die from overwatering than from thirst. Precise watering keeps indoor herb plants flavorful, compact, and resilient. Your goal: moist—not soggy—roots, fast drainage, and plenty of oxygen. If you’re Growing herbs indoors for beginners, a few simple habits will keep your indoor herb plants happy and your kitchen stocked.
What precise watering delivers:
- Strong, white roots instead of brown, mushy ones
- Brighter flavor and steady regrowth
- Fewer fungus gnats and disease issues
- Consistent yields from small indoor herb pots
Finger test and moisture meters for indoor herb plants
Skip guesswork. Use these quick checks to water only when your indoor herb plants truly need it.
- Finger test (the gold standard)
- Press your finger 1–2 inches into the soil.
- Water when the top 1 inch is dry for leafy herbs (basil, parsley, chives).
- Wait until 1.5–2 inches are dry for Mediterranean herbs (rosemary, thyme, oregano, sage).
- Keep mint and lemon balm evenly moist; don’t let them fully dry out.
- Pot weight test
- Lift the pot after a thorough watering to learn “heavy.”
- Check daily; when the pot feels noticeably lighter, it’s time to water.
- Pro move: Weigh a pot on a kitchen scale right after watering and again when it’s due; you’ll learn the sweet spot fast.
- Moisture meters (trust, but verify)
- Calibrate: Dip the probe in water (should read “wet”), then in dry potting mix (should read “dry”).
- Read at root level, not just the top inch.
- If you use an Indoor Herb Garden kit with wicking, expect slightly higher readings; still allow the top layer to dry between refills to deter gnats.
Tip: Cooler rooms and lower light slow drying. Warmer rooms, fans, and strong light speed it up. Let your plant—not the calendar—set the schedule for indoor herb plants.
Bottom watering vs. top watering (when to use each)
Both methods work. Use the right one for the right moment.
Bottom watering (great for even hydration)
- When to use:
- Dense foliage that deflects water (thyme, oregano)
- Seedlings or freshly potted herbs
- To reduce splashing soil and fungus gnat pressure
- How to do it:
- Fill the tray with 1–2 inches of water.
- Set pots in for 15–30 minutes.
- Remove and drain fully; the surface should feel faintly damp, not soaked.
Top watering (best for flushing salts)
- When to use:
- Monthly “reset” to flush fertilizer salts
- After applying dry amendments
- If soil has become water-repellent at the surface
- How to do it:
- Water slowly until 10–20% drains from the bottom.
- Empty the saucer immediately—never let pots sit in runoff.
- If water channels down the sides, pause a minute, then resume slowly to rehydrate the whole root ball.
Rule of thumb: Bottom water for routine moisture; top water periodically to keep soil fresh. Both approaches help indoor herb plants stay vigorous.
Ensure fast drainage to protect roots
Great drainage is non-negotiable. Roots need air as much as water.
Set up your containers and mix right:
- Indoor herb pots
- Always use containers with generous drainage holes.
- If using decorative cachepots, keep herbs in nursery liners you can lift out to water, then return once fully drained.
- Potting mix (airy and quick-draining)
- 50–60% high-quality potting mix
- 30–40% perlite or pumice for aeration
- 0–10% compost or worm castings for gentle nutrition
- For rosemary, thyme, and sage, increase perlite to the higher end.
- Smart upgrades
- Mesh or a shard over drain holes to prevent clogging (not to block them).
- A thin layer of coarse perlite at the base can speed initial drainage.
- If using a self-watering Indoor Herb Garden kit, choose a light, airy mix and let the top 0.5–1 inch dry between refills.
Quick 60-second drainage test
- Water thoroughly and time how long until excess stops dripping.
- Under 60 seconds: great.
- 1–3 minutes: acceptable; watch for sogginess.
- 3+ minutes: mix is too dense; repot with more aeration.
Repot cues
- Water pools on top, soil smells sour, or growth stalls despite good light.
- Up-pot just 1–2 inches wider and refresh with airy mix—your indoor herb plants will rebound fast.

Soil and drainage: build the right foundation
Healthy roots power flavor. Get the soil and drainage right, and your indoor herb plants will stay compact, aromatic, and productive. If you’ve ever watered and watched leaves droop, it’s not “too much water” alone—it’s not enough oxygen around the roots. Let’s fix that with an airy mix, smart containers, and a simple refresh routine that keeps indoor herb plants at peak performance.
What great soil and drainage deliver:
- Faster regrowth after harvests
- Fewer fungus gnats and disease issues
- Strong, white roots that anchor sturdy indoor herb plants
- Consistent moisture without soggy pockets in Indoor herb pots
Potting mix recipe that indoor herb plants love
Skip garden soil. Use a light, living potting mix that drains fast and rehydrates easily.
Simple, repeatable recipe (by volume)
- Base: 50–60% high-quality, peat-free potting mix or coco-coir blend
- Aeration: 25–40% perlite or pumice (more for Mediterranean herbs)
- Nutrition: 5–10% worm castings or fine compost
- Optional structure: 0–10% fine pine bark for long-term porosity
How to blend and pot
- Pre-moisten: Aim for “wrung-out sponge” moisture—damp, not dripping.
- Prep pots: Cover drainage holes with mesh (not rocks) so mix doesn’t escape.
- Fill and firm: Lightly—don’t pack. You want air pockets.
- Water-through test: Water until it drains; if runoff takes longer than 2–3 minutes, add more perlite.
- Myth-buster: Don’t add a “drainage layer” of pebbles. It actually raises the perched water table and makes roots wetter, not drier.
Using an Indoor Herb Garden kit?
- Choose an extra-light mix (higher perlite). Wicking systems keep the root zone moist; the airy mix prevents stagnation.
- Let the top 0.5–1 inch dry between refills to deter gnats and mildew.
Perlite, vermiculite, and aeration for strong roots
Think of aeration like tiny breathing rooms for roots. The right amendment mix keeps moisture available while preventing waterlogged pockets.
- Perlite (or pumice): Adds big air spaces and speeds drainage.
- Best for: rosemary, thyme, oregano, sage (Mediterranean herbs)
- Use more perlite if pots stay wet longer than 48 hours.
- Vermiculite: Holds water and nutrients (cation exchange), softens fast-drying mixes.
- Best for: basil, parsley, mint—herbs that like even moisture
- Blend lightly (5–15%); too much can get mushy.
- Fine pine bark: Adds structure that resists compaction over months.
- Coco coir vs. peat: Coir rewets easily and is beginner-friendly; if coir dries out, bottom-water once to rehydrate, then drain fully.
Do this, not that
- Do: Use multiple drainage holes and breathable Indoor herb pots.
- Do: Keep mixes uniform from top to bottom.
- Don’t: Cap the top with stones; it traps moisture at the surface.
- Don’t: Assume more water fixes droop—often it’s an aeration problem for indoor herb plants.
Refresh soil and repot on a smart schedule
Potting mix settles and roots expand. A quick refresh keeps nutrients available and drainage snappy.
Smart maintenance cadence
- Every month: Top-dress with 0.25 inch of worm castings; gently scratch in and water through.
- Every 6–8 weeks: Flush pots with clean water until 10–20% runoff to clear salts.
- 3–6 months: Light root check. If circling or dense, repot or root-prune.
- When repotting: Size up just 1–2 inches in diameter to avoid soggy, unused soil.
Clear signs it’s time
- Water sits on the surface or takes ages to drain
- Sour smell, algae/gnat bloom, or yellowing despite good light
- Roots circling the pot, or growth stalls after harvests
Repot step-by-step (10 minutes)
- Water lightly the day before (eases root release).
- Tease roots and snip 10–15% of the brown, circling ones.
- Refresh with airy mix; set the crown at the same height.
- Water through and let drain completely before returning to cachepots.
Table: soil recipes and repot timing by herb group
| Herb group (examples) | Mix ratio (Base/Perlite/Vermiculite/Compost) | Drainage goal (runoff time) | Repot cadence* | Notes |
|---|---|---|---|---|
| Mediterranean woody (rosemary, thyme, sage, oregano) | 50% / 35–40% / 0–5% / 5–10% | 30–90 seconds | 9–12 months | Keep on the drier side; add bark for long-term porosity. |
| Leafy/moisture-loving (basil, parsley, mint) | 60% / 20–25% / 10–15% / 5–10% | 60–120 seconds | 4–6 months | Even moisture; great for Growing herbs indoors for beginners. |
| Tolerant/easy (chives, lemon balm) | 55–60% / 25–30% / 5–10% / 5–10% | 45–120 seconds | 6–9 months | Flexible; good in small Indoor herb pots. |
*Repot cadence varies by pot size, harvest frequency, and environment. In an Indoor Herb Garden kit, favor lighter mixes and adjust intervals slightly longer due to steady moisture.
Build this foundation once, and your indoor herb plants will repay you with steady growth, fewer problems, and flavor on demand.
Containers that work for indoor herb plants: pots and kits
The right container turns good care into great results. Size, material, and drainage all determine how evenly moisture moves through the soil—and how confidently your indoor herb plants bounce back after every harvest. If you’re Growing herbs indoors for beginners, start with simple containers that make success automatic.
Indoor herb pots: size, material, and drainage guidelines
Think of pots as root real estate. Too big and soil stays wet; too small and plants dry out in hours.
- Size (most kitchens)
- 4–6 inch pots for basil, parsley, thyme, oregano, chives
- 6–8 inch for mint (always alone) and bushy sage
- 8 inch for dwarf rosemary if you want a longer run between waterings
- Material
- Terracotta: Breathable, prevents soggy roots; water a bit more often.
- Glazed ceramic: Holds moisture longer; great for sunny windows.
- Lightweight plastic/fabric: Easy to move; ensure strong drainage.
- Drainage must-haves
- Large holes, no “pebble layer” (it traps water higher up).
- Use a mesh square over holes to keep mix in, not water out.
- Slip functional nursery pots into decorative cachepots so you can lift, water, and fully drain.
- Smart add-ons
- Saucers or a waterproof tray to protect sills.
- Pot feet to keep bases from sitting in runoff.
Bottom line: breathable Indoor herb pots with generous drainage give indoor herb plants oxygen—and oxygen keeps roots white, springy, and productive.
Indoor Herb Garden kit: when it’s worth it and how to optimize
Kits shine when light is scarce or schedules are busy. They bundle water reservoirs, wicks, and LEDs so growth is predictable.
- When kits make sense
- Dim apartments or winter growing
- Frequent travelers who need consistent moisture
- Small counters where tidy, all-in-one setups win
- Optimize for flavor and longevity
- Use fresh seed or healthy plugs; avoid overcrowding pods.
- Keep the light 6–10 inches above the canopy and run 12–16 hours daily.
- Refresh nutrients as directed; flush with plain water monthly to prevent salt buildup.
- Wipe domes and reservoirs every 2–4 weeks to deter algae.
- Pro tip
- If your kit allows, swap in an airier pod mix (a little extra perlite) so roots get more oxygen. This helps indoor herb plants stay compact and aromatic.
Self-watering systems: pros, cons, and best practices
Reservoir pots and wicking planters can be game changers—but not for every herb.
- Pros
- Stable moisture for leafy herbs (basil, parsley, mint)
- Fewer missed waterings, fewer droops
- Cons
- Mediterranean herbs (rosemary, thyme, sage) dislike constant wet
- Salt accumulation if you never top-water to flush
- Best practices
- Use an airy mix (add 25–40% perlite).
- Let the top 0.5–1 inch dry before refilling the reservoir.
- Top-water lightly every 3–4 weeks until 10–20% runoff; empty the saucer.
- For rosemary/thyme, run “reservoir dry days” weekly to keep roots aerated.
Group herbs by needs on trays, rails, and windowsills
Not all herbs drink or sunbathe the same. Grouping simplifies care and evens out growth.
- Thirsty cluster (closer to the faucet/light)
- Basil, parsley, chives—water when the top inch dries
- Dry-loving cluster (brighter spot, faster airflow)
- Rosemary, thyme, oregano, sage—water when 1.5–2 inches are dry
- Wild card
- Mint—own pot, medium light, steady moisture
- Placement hacks
- Use narrow trays or rails to keep similar herbs together.
- Elevate short pots so every plant meets the light evenly.
- Rotate groups weekly for balanced growth.
Result: fewer mistakes, faster routines, and indoor herb plants that look as good as they taste.
Feed for flavor: simple fertilizing that’s foolproof
You don’t need a complicated program—just steady, gentle nutrition. Overfeeding can dull flavor, but underfeeding stalls regrowth. Aim for a light, consistent plan that supports frequent harvests.
Organic feeding schedule for indoor herb plants
Keep it simple and repeatable.
- Every 2 weeks (active growth): Half-strength organic liquid feed (fish/seaweed or kelp)
- Monthly: 0.25 inch worm castings as a top-dress; water in
- Winter or low light: Feed monthly at half strength
- Flush salts: Run plain water through the pot until 10–20% drains every 6–8 weeks
Tip: In an Indoor Herb Garden kit, follow the manufacturer’s nutrient schedule precisely and keep the reservoir clean. Stable EC = stable flavor.
Liquid vs. slow-release nutrients: what to use and when
- Liquid fertilizers
- Best for responsive control and quick correction
- Great for cooks who harvest often and want to nudge growth
- Slow-release (pellets/prills)
- Best for low-maintenance setups and vacations
- Mix lightly into the top inch of soil; still flush occasionally
- Hybrid approach
- Use slow-release as a baseline, then “top up” with half-strength liquid in peak season
Rule of thumb: feed lightly, observe, adjust. Healthy indoor herb plants have steady new shoots and rich color—without racing to seed.
Compost teas and microbial inoculants for resilience
Microbes make nutrients more available and help roots handle stress.
- Easy win
- Use a ready-to-mix microbial inoculant (mycorrhizae, beneficial bacteria) at transplant and monthly.
- If brewing compost tea
- Keep it simple, well-aerated, and use within 24 hours.
- Apply to moist soil; wipe spills to avoid gnats.
- Low-mess alternative
- Diluted worm-casting extract (steep 12–24 hours) for a mild, odor-light boost.
Microclimate mastery: temp, humidity, airflow
The “weather” around your pots matters more than the thermostat across the room. Stable temperature, moderate humidity, and gentle airflow keep indoor herb plants compact and clean.
Ideal ranges for popular indoor herb plants
- Temperature
- Day: 65–75°F (18–24°C)
- Night: 60–68°F (16–20°C)
- Humidity
- 40–60% RH is the sweet spot
- Group targets
- Mediterranean (rosemary, thyme, sage, oregano): drier side of the range; avoid steamy kitchens
- Leafy (basil, parsley, mint, chives): mid-range humidity; steady moisture
If you’re using an Indoor herb garden with grow light, check canopy temperature with your hand—leaves should feel warm, never hot.
Humidity trays, pebble pans, and small fans for airflow
- Pebble trays
- Fill a shallow tray with pebbles, add water just below the pebble tops, and set pots on top (not in the water).
- Spot fans
- A small, oscillating fan on low for a few hours daily prevents mildew and strengthens stems.
- Spacing
- Keep leaves from touching; air moving between plants discourages pests and disease.
Simple tools, big impact—your indoor herb plants will stay perky and mildew-free.
Avoid drafts, heat vents, and stovetop stress
- Keep pots 2–3 feet from heating vents and 1 foot from cold windows in winter.
- Use vent deflectors or magnetic covers near forced air.
- Cook often? Give herbs a “safe zone” away from steam and grease, and wipe leaves with a damp cloth weekly.
Consistency wins. Fewer shocks mean steadier growth and better flavor.
Prune, pinch, harvest: more growth, better taste
The more you harvest (correctly), the more plants branch. Pruning directs energy into new, tender shoots—the most flavorful part of indoor herb plants.
Pinching techniques for bushy indoor herb plants
- Basil, mint, oregano, lemon balm
- Pinch or snip just above a leaf pair (node). Two shoots replace one.
- Start early when plants are 4–6 inches tall.
- Parsley
- Cut outer stems at the base; leave the inner crown to keep producing.
- Chives
- Shear like a lawn 1–2 inches above the soil; they rebound fast.
- Rosemary and thyme
- Take soft tips only; avoid cutting into old, woody stems.
Use clean scissors, and never remove more than one-third of a plant at a time.
Harvest timing for maximum oils and flavor
- Best moment
- Morning, after leaves rehydrate overnight
- Before flowering
- Pinch off buds on basil, oregano, and mint to keep oils concentrated in leaves.
- Frequency
- Light snips 2–3 times per week beat heavy, infrequent cuts.
Quick cue: fragrant, firm leaves signal peak flavor in indoor herb plants.
Rejuvenation cuts and preventing bolting
- Leggy plants
- Cut back to just above a low node with healthy side shoots; rotate the pot and improve light.
- Bolting prevention
- Keep basil pinched weekly; keep cilantro cool and sow new batches every 3–4 weeks.
- Parsley is biennial—when it sends a central flower stalk in year two, start fresh.
- Propagation boost
- Root stem cuttings of basil, mint, oregano, or rosemary in water, then pot up. It’s the fastest reset for tired plants.
Healthy pruning habits turn a few small pots into a steady stream of bright, kitchen-ready sprigs.

Prevent pests and diseases naturally
A clean, steady environment is your best pesticide. Indoors, you control light, water, and airflow—so use that advantage to keep indoor herb plants strong and unappetizing to pests. A simple weekly routine prevents most problems before they start, especially for Growing herbs indoors for beginners.
Common indoor herb plants pests and organic controls
Know the signs and act fast. Gentle, food-safe remedies work best when plants are small and pests are few.
- Aphids (clusters on tender tips; sticky honeydew)
- Controls: Rinse with a firm sink spray, then apply insecticidal soap. Repeat every 3–5 days for two cycles. Pinch off heavily infested tips and encourage bushy regrowth.
- Spider mites (speckled leaves; fine webbing on undersides)
- Controls: Increase humidity and airflow; wipe leaves with a damp cloth; use insecticidal soap or horticultural oil labeled for edibles. Rotate treatments to break cycles.
- Fungus gnats (tiny flies; larvae in wet soil)
- Controls: Let the top 0.5–1 inch of mix dry; bottom-water; add yellow sticky traps; use BTI (Bacillus thuringiensis israelensis) per label to target larvae. Ensure Indoor herb pots drain fast.
- Whiteflies (small white moth-like insects; leaf yellowing)
- Controls: Yellow sticky traps, gentle vacuuming in the morning, then insecticidal soap on leaf undersides.
- Thrips (silvery streaks; distorted new growth)
- Controls: Blue sticky cards, targeted spinosad or soap per label, and stronger airflow to disrupt adults.
Disease quick hits
- Root rot: Usually overwatering + dense soil. Repot into an airy mix and adjust watering—your indoor herb plants will often bounce back.
- Botrytis (gray mold): Remove affected leaves, increase spacing and airflow, and water in the morning so foliage dries quickly.
Tip: Always test any spray on one leaf first and harvest after rinsing thoroughly.
Quarantine, cleaning routines, and beneficial insects
Strong hygiene beats constant spraying.
- Quarantine newcomers
- Isolate new plants for 10–14 days. Scout under leaves with a magnifier before they join your main shelf of indoor herb plants.
- Clean and reset weekly
- Wipe leaves and windowsills, sanitize shears (70% isopropyl), refresh sticky traps, and empty saucers.
- For an Indoor Herb Garden kit, rinse reservoirs and lids every 2–4 weeks to deter algae and gnats.
- Beneficials (optional, targeted)
- Fungus gnat larvae: Beneficial nematodes.
- Whiteflies/aphids: Encarsia/Aphidius (micro-wasps) for serious infestations.
- Use only species suited to indoor releases and follow supplier guidance.
Stop powdery mildew with airflow and spacing
Powdery mildew loves still, humid air and crowded leaves—fix the microclimate first.
- Space plants so leaves don’t touch; trim dense centers.
- Run a small fan on low for a few hours daily; aim for gentle leaf movement.
- Water soil, not foliage; avoid misting at night.
- Remove the first spotted leaves and improve light penetration.
- If needed, use a potassium bicarbonate spray labeled for edibles or a 10% milk solution; apply at dusk and rinse leaves before cooking.
Result: clean, fragrant indoor herb plants that stay harvest-ready.
Year-round success and quick troubleshooting
Yes—you can keep indoor herb plants productive 12 months a year. The formula is simple: consistent light, even moisture, airy soil, and frequent, gentle harvests. A timer and a short weekly “scout-and-reset” routine make it nearly automatic.
Can herbs be grown indoors year round?
Absolutely. With a stable 65–75°F room, 40–60% humidity, and reliable light, herbs won’t need a seasonal “rest.”
- Light: 12–16 hours/day on a timer; an Indoor herb garden with grow light or a compact bar LED keeps growth steady.
- Succession: Re-sow cilantro every 3–4 weeks, divide chives seasonally, and take basil/mint cuttings to refresh older plants.
- Nutrition: Feed lightly, flush salts every 6–8 weeks, and top-dress with worm castings monthly.
If you’re Growing herbs indoors without sunlight, a basic LED setup still delivers excellent flavor year-round.
Seasonal light tweaks and grow-light timers
Match your light to the season to prevent legginess and early bolting.
- Winter
- Extend to 14–16 hours; lower the fixture or increase intensity slightly.
- Summer
- 12–14 hours is plenty; raise the light to reduce heat stress.
- Herb-specific cues
- Cilantro prefers cooler temps and shorter days (12–13 hours) to delay bolting.
- Basil loves bright, long days; keep it closest to the light.
- Automation
- Use digital timers and, if available, a dimmer to fine-tune intensity without moving fixtures.
Diagnose yellowing leaves, legginess, and slow growth
Read the leaves and fix the cause, not just the symptom.
- Yellowing leaves
- Likely causes: Overwatering and poor drainage; or mild nitrogen deficiency.
- Fix: Let the top inch dry, improve aeration, flush salts, then feed at half strength. Check that Indoor herb pots have large, unobstructed drainage holes.
- Legginess (long gaps between leaves)
- Likely causes: Low light intensity or too few hours.
- Fix: Move closer to the light, extend by 1–2 hours, rotate pots every few days, and pinch tips to branch. Indoor herb plants respond quickly.
- Slow growth
- Likely causes: Cool roots, compacted mix, or a root-bound plant.
- Fix: Warm the zone to 65–75°F, repot into a lighter mix, and prune lightly to stimulate new shoots.
- Leaf spotting or silvering
- Likely causes: Thrips, mites, or splash-back fungi.
- Fix: Improve airflow, use sticky cards, and apply insecticidal soap after lights switch off.
Quick weekly “scout-and-reset” (3 minutes)
- Turn each pot, check undersides of leaves, test moisture, snip a few sprigs, and empty saucers.
When to start over vs. propagate fresh cuttings
Sometimes the fastest path to lush is a fresh start.
- Start over when
- Plants are woody, infested after two treatment cycles, or roots are a dense spiral and growth has stalled.
- Propagate when
- Tops are clean but lower growth is tired.
- Take 4–6 inch cuttings of basil, mint, oregano, or rosemary; strip lower leaves, root in water or perlite, then pot up.
- Pro move
- Keep a small “nursery row” of backups so your indoor herb plants never miss a beat during resets.
With a light touch and steady habits, you’ll enjoy bright, aromatic harvests from indoor herb plants in every season—no backyard required.
Conclusion:
What if your kitchen always smelled like fresh basil and thyme—and your harvests actually kept up with your cooking? With a few steady habits, your indoor herb plants can deliver vibrant flavor week after week, no matter the season or window.
Here’s the big picture distilled into three principles:
- Consistent light. Use a timer and, if needed, an indoor herb garden with grow light so intensity and hours don’t drift.
- Precise moisture. Water by feel, not the calendar; keep roots airy and never let pots sit in runoff.
- Regular harvesting. Pinch and prune lightly and often to keep growth compact and aromatic.
Quick wins you can do today
- Set a 12–16 hour timer on your LEDs. If you’re Growing herbs indoors without sunlight, this one step prevents legginess and weak flavor.
- Check drainage. Make sure your Indoor herb pots have big, open holes and a breathable mix; empty saucers after every watering.
- Do the finger test. If the top inch is dry (or 1.5–2 inches for Mediterranean herbs), water thoroughly, then let excess drain.
- Pinch the tips. Take small snips above a leaf node to spark branching—your indoor herb plants will bulk up fast.
- Flush and feed lightly. Rinse salts with plain water, then follow with a half-strength organic feed next time.
- Tidy the microclimate. Space plants so leaves don’t touch, run a small fan on low, and wipe leaves and sills weekly.
If you’re Growing herbs indoors for beginners, start simple: pick two or three compact favorites, give them a reliable light schedule, and track watering with a moisture check. Prefer a streamlined setup? An Indoor Herb Garden kit makes timing and watering nearly automatic—perfect for busy weeks or darker corners.
Most of all, keep it repeatable. A 3-minute “scout-and-reset” once a week—turn pots, test moisture, snip a few sprigs—keeps indoor herb plants healthy, flavorful, and ready whenever you are. Which small tweak will you make first: set the timer, refresh the soil, or give your thyme a gentle pinch? Your indoor herb plants are one habit away from thriving year-round.
Dennis P. Hansen
Dennis P. Hansen is a home gardener with a genuine passion for plants and the simple pleasure of growing them. He enjoys caring for houseplants, succulents, and other plants at home while continually learning from everyday gardening experiences. Dennis likes to share practical plant care tips, useful observations, and simple solutions that can help others grow healthier plants. He believes that caring for plants is a rewarding journey and that there is always something new to learn along the way.