
9 Secrets for a Stunning Flower Plant Home Setup


Table of Contents
Introduction:

Ready to build a flower plant home that looks stunning and actually thrives? If you’ve ever placed a beautiful bloom in the wrong spot, juggled watering schedules, or worried about pet safety, you’re in the right place. In this guide, we’ll unpack nine practical secrets that help you plan, choose, style, and care for your plants with confidence—so your flower plant home becomes a calm, colorful focal point instead of a fussy project.
A flower plant home isn’t just décor; it’s a system. It starts with understanding your space—where bright indirect light falls during the day, which corners stay dim, and how containers and potting mix support healthy roots. From there, you’ll select blooming houseplants that match your lifestyle (and your lighting), with pet-friendly houseplants if you share your home with curious companions. Then comes the fun part: styling dynamic groupings for visual impact. Finally, you’ll keep everything thriving with quick, consistent houseplant care and simple, proactive pest control.
Here’s how the journey unfolds:
- Plan your space: Map light zones (especially bright indirect light), and choose the right potting mix and containers for reliable drainage.
- Choose blooms that fit your life: Opt for resilient blooming houseplants and pet-friendly houseplants that suit your routine and rooms.
- Style for impact, not clutter: Layer heights and textures so arrangements look intentional and balanced in any room.
- Keep it thriving: Lean on fast, repeatable houseplant care habits and early, gentle pest control to prevent problems before they spread.
As you move through these secrets, you’ll learn to match low-light plants to shaded nooks, position light-loving blooms where they’ll flourish, and set up maintenance that takes minutes—without sacrificing beauty. Expect practical checklists, budget-friendly swaps, and pro tips that work in real homes.
By the end, you’ll know exactly how to create your flower plant home with less guesswork and more glow—one that reflects your style, fits your schedule, and stays vibrant year-round.
Plan your space for a successful flower plant home
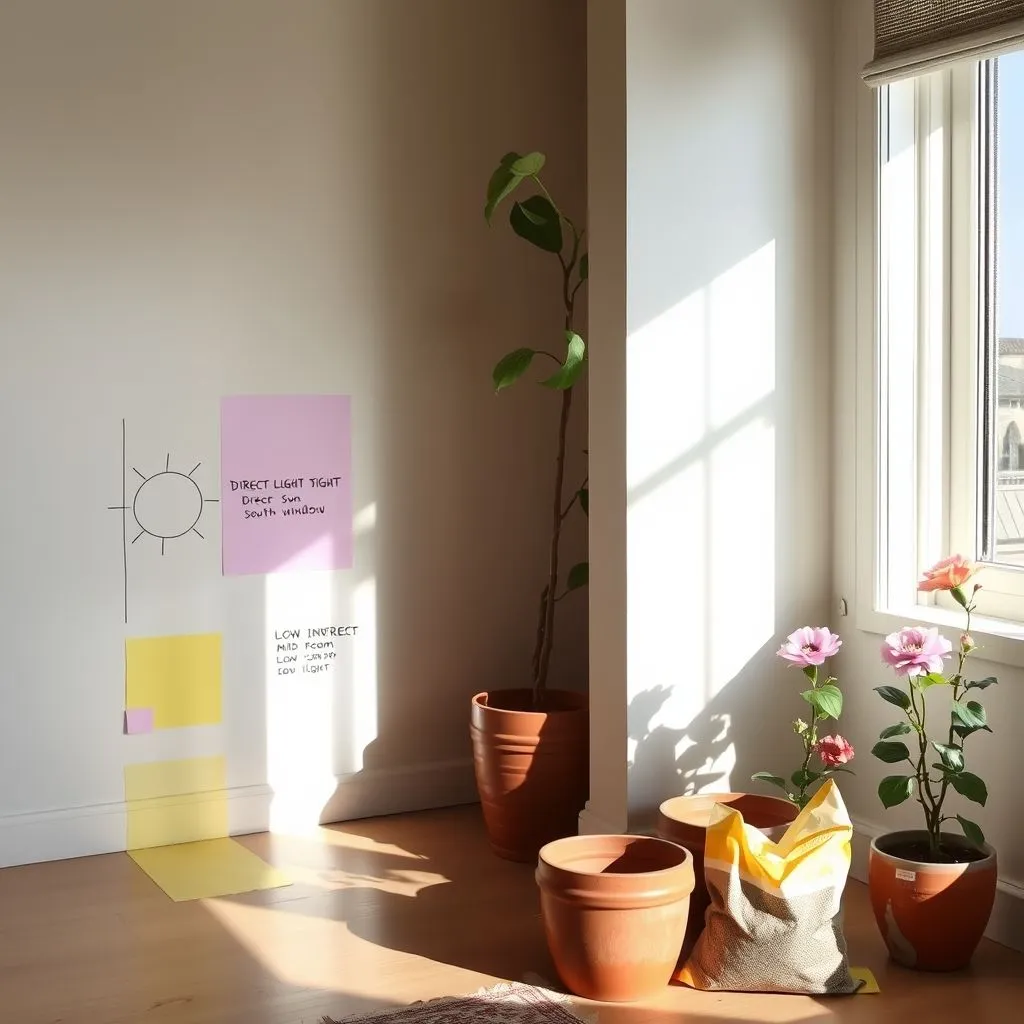
Before you bring home another pot or bloom, give your space a plan. A thoughtful layout turns your flower plant home into a low-maintenance sanctuary: Where does daylight linger at 9 a.m., noon, and 3 p.m.? Which corners stay dim? How do you move through the room when you water? Answering these questions helps your indoor plants thrive—and helps you spend less time troubleshooting.
Think of your room as a mini-ecosystem. Light, airflow, humidity, and surfaces all influence whether roots stay healthy and blooms last. With a simple map and a few smart container choices, your flower plant home will look lush and stay that way.
Secret 1: Map light zones for a thriving flower plant home
Light—not water—is the primary driver of growth and blooms indoors. Mapping light zones is the fastest way to choose the right plant for the right place.
Tools you already have
- Your phone’s compass and camera
- A free light meter app (optional but helpful)
- Sticky notes or painter’s tape
Your 5-step light-mapping routine
- Observe the sun’s path
- Take quick photos at 9 a.m., noon, and 3 p.m. for two days.
- Note where direct rays hit and where the light softens.
- Do the shadow test
- Sharp, crisp shadow: direct sun.
- Soft, blurred shadow: bright indirect light.
- Barely-there shadow: low light.
- Check window orientation and distance
- South/west-facing windows deliver the strongest sun; move plants 3–6 feet back or diffuse with sheers to create bright indirect light.
- East-facing windows offer gentle morning sun—great for many blooming houseplants.
- North-facing windows are lowest light; keep low-light plants within 1–3 feet of the glass.
- Spot blockers and reflectors
- Trees, awnings, deep window wells, and dark curtains reduce light.
- White walls, mirrors, and glossy surfaces bounce light deeper into the room.
- Draw a simple placement map
- Color-code three zones on a quick floor sketch:
- Direct sun (near glass or unfiltered beams)
- Bright indirect light (near windows with sheers or 3–6 feet back)
- Low light (interior corners)
- Label shelves, plant stands, and side tables.
Quick placement blueprint
- Bright indirect light zone: Cluster light-loving, flowering candidates like African violets, anthuriums, and begonias. Rotate a quarter-turn weekly for even growth.
- Direct sun (buffered): Use sheer curtains or place plants behind another object to soften rays; ideal for sun-tolerant indoor plants in cooler months.
- Low light: Reserve for low-light plants with sturdy foliage. If you want color here, use a small grow bulb (400–800 lumens, warm white) on a timer.
Pro tips that save you time
- Seasonal shift: Expect sun angles to change. Re-check your map at the start of spring and fall.
- Height matters: Light intensity drops quickly with distance. Shelf risers bring shorter plants into the sweet spot.
- Airflow without drafts: Gentle airflow discourages fungal issues; avoid cold blasts from vents.
What success looks like
- Compact, sturdy growth (not leggy)
- Steady bud formation on blooming houseplants
- Fewer “mystery” problems that are really light problems in disguise
Secret 2: Containers, soil, and drainage that keep roots healthy
Roots thrive when water can move freely through a well-aerated potting mix and out the drainage holes. The right container choices are the backbone of reliable houseplant care—and the difference between thriving and merely surviving.
Choose the right container material
- Terracotta: Porous and breathable; great for plants that prefer to dry slightly between waterings. Helps prevent overwatering.
- Glazed ceramic: Holds moisture longer; ideal for thirstier plants or warm rooms. Ensure a drainage hole.
- Lightweight plastic: Retains moisture and is easy to move; pair with a chunky mix for better airflow.
Drainage rules that actually work
- Non-negotiable: A drainage hole. No hole, no go.
- Skip the “pebbles at the bottom” myth. They raise the water table and can trap moisture around roots.
- Use a saucer or cachepot to protect furniture, but keep the grower pot free-draining.
Dial in your potting mix
- Most flowering houseplants prefer a fluffy, well-draining mix:
- 2 parts high-quality potting mix
- 1 part perlite or pumice (aeration)
- 1 part fine bark or coco chips (structure)
- For moisture-loving plants, add a handful of coco coir for extra water retention.
- For plants prone to rot, increase the chunky components for faster drainage.
Sizing and repotting
- Size up only 1–2 inches wider than the current pot. Oversized containers stay wet too long.
- Repot when you see circling roots or the mix breaks down and stays soggy.
- Repotting steps:
- Water lightly the day before.
- Loosen roots and trim any mushy, brown sections.
- Add a mesh or coffee filter over the hole to keep mix in, not water out.
- Set the plant at the same height it sat before; backfill and gently firm.
Watering strategies that prevent stress
- Water thoroughly until you see runoff, then discard excess in the saucer.
- Consider self-watering planters for consistent moisture—especially in dry climates or if you travel. Choose models with a visible reservoir and wicking system.
- Bottom-water occasionally to rehydrate a dry, hydrophobic mix; then resume normal top watering.
Smart add-ons for healthier roots
- Top dressing of fine bark or decorative pebbles reduces soil splash and helps retain even moisture.
- A moisture meter can guide beginners, but confirm with a finger test 1–2 inches down.
- Fertilize lightly during active growth with a balanced, dilute feed to support blooms.
Maintenance cues to watch
- Leaves yellowing from the base? Often a sign of prolonged sogginess. Improve drainage or increase aeration.
- Wilting with damp soil? Check for root rot; unpot, trim, and repot into a fresher, chunkier mix.
- Stagnant growth despite good light? Refresh the potting mix and consider a slightly larger pot.
Put it all together
- Map light first, then match containers and mixes to the environment you actually have. With bright indirect light in the right zones and a breathable setup under the soil line, your flower plant home will reward you with steady growth, cleaner routines, and longer-lasting blooms.
Choose blooms that fit your life
If you want a flower plant home that looks gorgeous without stealing your weekends, start by choosing blooms that match your routine—not the other way around. How much light do you truly have? Are your rooms warm and dry, or cool and humid? Do pets patrol your windowsills? When you pair your lifestyle with the right indoor plants, your flower plant home becomes effortless to maintain and a joy to live with.
Secret 3: Match plants to room microclimates for low-effort growth
Every room has microclimates—pockets where light, temperature, and humidity behave differently. When you align blooming houseplants to those conditions, you’ll spend less time troubleshooting and more time admiring buds.
Do a quick 10-minute microclimate audit
- Light: Stand in each spot at 9 a.m., noon, and 3 p.m. Note direct sun vs. bright indirect light vs. shade.
- Temperature: Feel for drafts near doors, windows, and vents; notice hot zones near radiators or electronics.
- Humidity: Kitchens and bathrooms tend to be higher; interior rooms are often drier.
- Use: High-traffic tables may get bumped; shelves stay safer and more stable.
Place by microclimate
- Bright, warm, filtered (south/west room, behind sheers)
- Best fits: Phalaenopsis orchids (long-lasting spikes), hoya (clusters of starry blooms), anthurium (nearly year-round color if you don’t have pets).
- Why it works: Light fuels flowers; warmth speeds growth; filtered rays prevent leaf scorch.
- Gentle morning sun + stable days (east windows)
- Best fits: African violet, lipstick plant (Aeschynanthus), gloxinia.
- Why it works: Morning sun is mild; consistent temps support bud set.
- Cool + bright (near draft-free north/east windows in fall–winter)
- Best fits: Holiday cactus (Schlumbergera), cyclamen (for pet-free homes).
- Why it works: Cooler nights encourage blooms for these seasonal stars.
- Interior low light
- Reality check: Color is limited here. Use low-light plants for foliage interest or add a discreet grow bulb to trigger blooms. Rotate plants from brighter staging areas weekly.
Placement heuristics that simplify houseplant care
- No blooms? Increase light first. Most “care” problems are light problems.
- Keep bloomers 3–6 feet from strong windows to land in bright indirect light.
- Rotate a quarter-turn weekly for even growth and bud distribution.
- Group plants by needs (light + humidity) so watering and feeding stay simple.
Secret 4: Pet-safe picks for a worry-free flower plant home
Sharing space with curious companions? Choose pet-friendly houseplants that still deliver color. Always confirm specific varieties with a trusted source if you’re unsure.
Bloomers that are generally considered non-toxic to cats and dogs
- African violet (Saintpaulia): Compact rosettes, prolific flowers in bright indirect light.
- Phalaenopsis orchid: Long-lasting blooms, prefers bright indirect light and gentle watering.
- Holiday cactus (Schlumbergera): Buds with cooler nights; vibrant winter color.
- Bromeliads (Guzmania, Aechmea, Neoregelia): Bold bracts; thrive in bright, steady conditions.
- Wax plant (Hoya carnosa): Starry clusters; tolerates some dryness between waterings.
- Gloxinia (Sinningia speciosa): Velvet leaves and showy blooms; bright, stable light.
- Gerbera daisy (as a short-term indoor accent): Big cheerful flowers; treat like a rotating seasonal plant.
Steer clear or place out of reach in pet homes
- Peace lily, anthurium, kalanchoe, cyclamen, and true lilies (extremely dangerous to cats).
- If you adore a non-pet-safe plant, display it in a closed office, a high shelf with no access, or a hanging basket away from launch points.
Pet-proofing tips that actually work
- Elevate with sturdy wall shelves; avoid wobbly stands.
- Cover soil with small pebbles to discourage digging.
- Wipe fallen petals/leaves promptly, and keep fertilizer bottles sealed.
- Offer safe cat grass as a decoy for leaf-nibblers.
Secret 5: Seasonal rotation for nonstop color on any budget
Continuous color doesn’t require a giant collection—or a giant spend. Think “anchors + accents”: keep a few reliable bloomers year-round, then rotate seasonal stars.
Build your rotation
- Anchors (steady performers)
- Phalaenopsis orchid: Long bloom windows; elegant spikes.
- Anthurium (for pet-free homes): Consistent spathes in bright indirect light.
- Hoya: Periodic, fragrant clusters once established.
- Seasonal accents (swap 2–4 times a year)
- Spring: African violet, gloxinia.
- Summer: Bromeliads; lipstick plant for trailing color.
- Fall: Holiday cactus buds as nights cool.
- Winter: Cyclamen (pet-free homes) or a fresh flush of African violet blooms.
Budget-friendly ways to keep color coming
- Buy smaller 4-inch pots and group in threes for impact.
- Use cachepots: slide new plants into the same decorative sleeves for instant refresh.
- Stagger lifespans: pair one long bloomer with one short-term “wow” so something is always peaking.
- Deadhead spent flowers weekly to extend bloom cycles.
- Set calendar reminders to rotate plants between brighter and lower-light spots as seasons change.
Care rhythms that support rotation
- Feed lightly during active growth; pause or reduce in low-light months.
- Water to the plant, not the calendar—check soil before each watering.
- Quarantine new arrivals for a week and inspect leaves and stems before they join the display.
Your flower plant home should serve your life—not compete with it. By matching microclimates, choosing pet-safe color where needed, and rotating a few strategic bloomers through the year, you’ll enjoy a fresh, vibrant flower plant home that fits your schedule, your style, and your space.
Style for impact, not clutter
Want your flower plant home to look curated—not chaotic? Styling is where intention meets ease. Instead of scattering pots on every surface, we’ll turn your indoor plants into purposeful vignettes that deliver visual punch and breathing room. Think layers, texture, and repetition—supported by the light your blooms love.
Secret 6: Layer heights, textures, and groupings for a designer look
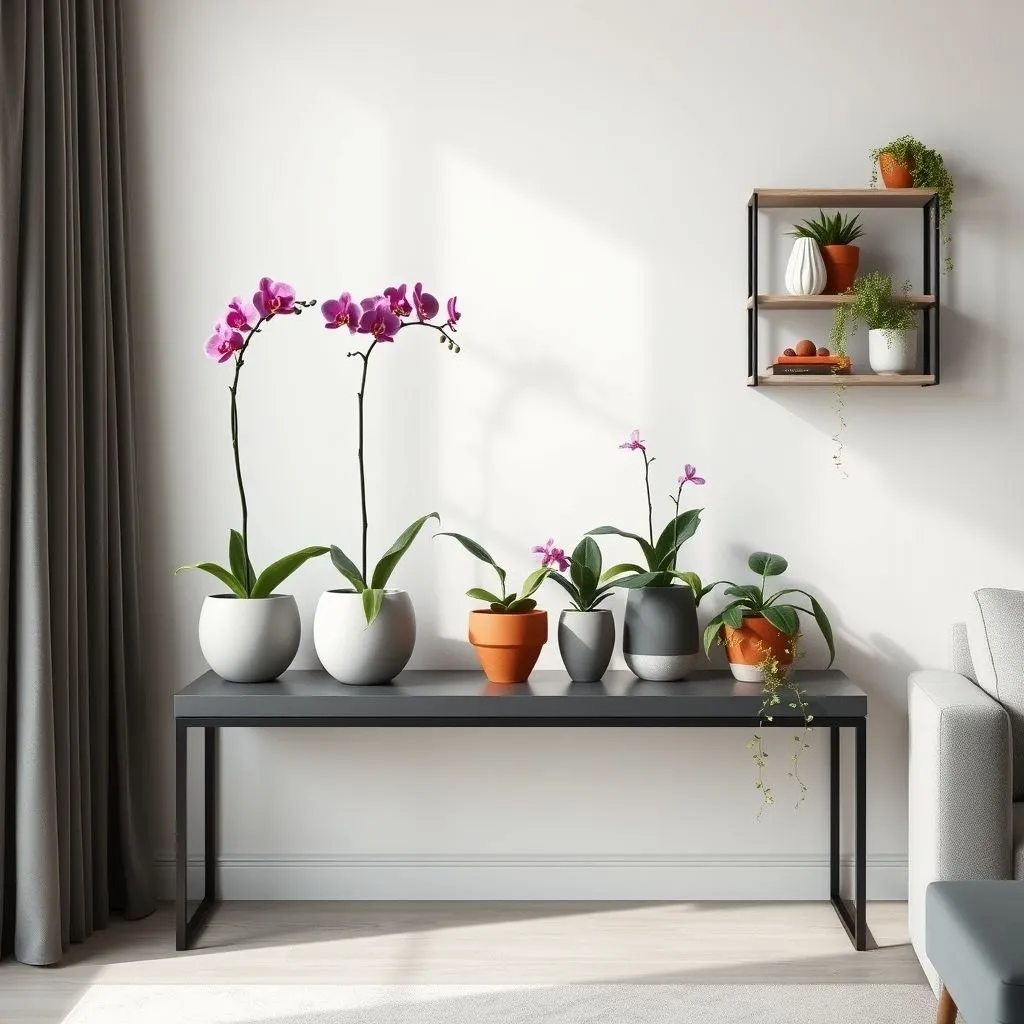
Great styling starts with structure. Use simple frameworks that you can recreate on any surface, from a console to a bookshelf.
The visual triangle (your go-to formula)
- 3 heights: one tall, one medium, one low/trailing.
- 2 textures: matte + glossy, terracotta + ceramic, smooth foliage + ruffled leaves.
- 1 focal bloom: a showy piece that draws the eye.
5-minute styling sprint
- Place the tallest element to set the peak (a floor plant on a stand or a tall orchid spike).
- Add a medium plant with full foliage to bridge the height gap.
- Introduce a trailing or low plant to create flow.
- Corral with a tray to define boundaries and prevent clutter creep.
- Edit: remove one item to create negative space. Your arrangement should breathe.
Surface-by-surface recipes
- Coffee table: Low focal orchid or African violet + small trailing hoya + sculptural object (book stack or tray). Keep sight lines clear.
- Console/entry: Tall plant on a pedestal stand + medium bromeliad + trailing pothos. Mirror behind to bounce bright indirect light.
- Bookshelf: Alternate left-right triangles on each shelf; use footed bowls for lift and vary leaf textures for depth.
- Dining table: One medium centerpiece on a shallow bowl; skip tall pieces so conversation flows.
Styling principles that never fail
- Odd numbers win: Group in 3s or 5s for rhythm.
- Scale and proportion: Big surface, bigger plants; small surface, tighter trio.
- Repetition: Echo a planter material or leaf shape twice to unify the vignette.
- Negative space: Leave gaps around each cluster so blooms read as intentional, not busy.
Light-aware styling
- Put your blooming houseplants in bright indirect light zones and stage foliage-forward plants in lower light areas.
- Rotate displays a quarter-turn weekly to even out growth and color.
Texture toolkit
- Mix leaf textures: glossy anthurium (pet-free homes) with velvety African violet and wiry hoya.
- Combine finishes: matte ceramic, warm terracotta, and one subtle metallic accent.
- Add soft textiles nearby (linen runner, boucle stool) to contrast structured greenery.
Clutter-proof habits
- Use trays to contain groups; if items spill beyond the tray, you’re overcrowding.
- Keep planter heights varied with risers or stacked books.
- Edit monthly: remove tired pieces, clean leaves, and reset the triangle.
Secret 7: Unify your flower plant home with color palettes and planters
Cohesion makes a space feel designed. A simple palette and repeated materials can tie the whole flower plant home together—room to room.
Pick a palette (60–30–10 rule)
- 60% neutral planters: white, sand, stone, or graphite.
- 30% warm anchor: terracotta or warm wood.
- 10% accent: a single hue that echoes blooms (orchid magenta, coral, or citrus).
Palette ideas to steal
- Warm minimal: Terracotta + cream + soft coral blooms.
- Calm modern: Sage + white + graphite planters with pale pink flowers.
- Elevated contrast: Black + brass accents + white ceramics with vivid orchid spikes.
Planters that pull the look together
- Shapes: Repeat one silhouette (cylinder or footed bowl) across the room for calm continuity.
- Materials: Stick to two finishes (matte ceramic + terracotta) and one accent (rattan or metal).
- Cachepot trick: Keep nursery pots inside decorative sleeves for quick swaps as seasons change.
- Hidden help: Use self-watering planters in high-traffic zones—clean lines on the outside, consistent moisture on the inside.
Color-smart blooms
- Echo, don’t match: Let flowers pick up the accent tone without duplicating it exactly.
- Stagger intensity: One vibrant bloom per vignette, the rest supportive foliage.
- Seasonal swaps: Rotate in a new color pop each quarter without changing the base planters.
Consistency cues across rooms
- Repeat planter finishes from the living room in the bedroom for a through-line.
- Keep the same grouping method (visual triangle) on different surfaces.
- Limit accessories so plants stay the heroes.
Maintenance that preserves the look
- Dust and shine leaves weekly so colors read true.
- Refresh top dressing (fine bark or pebbles) for a crisp finish.
- Keep saucers sleek and matching to avoid visual noise.
When you style with structure and unify with palette, your flower plant home feels intentional at a glance—and effortless day to day. It’s designer-level indoor gardening made simple.
Keep it thriving with smart care
A beautiful flower plant home doesn’t just happen—it’s maintained with a few smart habits you can run on autopilot. The goal isn’t perfection; it’s a simple rhythm that keeps your blooms fresh, your routines short, and your confidence high. Ready to streamline your houseplant care without sacrificing results?
Secret 8: Weekly care checklist for your flower plant home—water, feed, prune, and inspect fast
This 10-minute routine keeps your flower plant home humming while preventing small issues from becoming big ones.
Your 10-minute weekly rhythm
- Scan and rotate
- Do a quick walkthrough. Turn each plant a quarter turn for even growth and color.
- Confirm placement in bright indirect light for your blooming plants.
- Check moisture the smart way
- Use the finger test 1–2 inches down or weigh the pot in your hands (dry pots feel noticeably lighter).
- In warm, bright rooms, expect faster dry-down; in cooler spots, slow it down.
- Water thoroughly, then drain
- Water until ~10–20% runoff, then empty saucers. Consistency beats frequency.
- Using self-watering planters? Let the reservoir go empty for a day between refills to keep roots oxygenated.
- Feed lightly, regularly
- During active growth, use a balanced, dilute fertilizer (¼–½ strength) every 2–4 weeks.
- Skip feeding when light is low or growth pauses—fertilizer supports growth; it doesn’t create it.
- Prune and groom in one pass
- Deadhead spent blooms to trigger new buds.
- Snip yellowing leaves at the base; pinch leggy tips to encourage branching.
- Wipe dust from leaves so they can photosynthesize efficiently.
- Inspect fast, top to bottom
- Tops of leaves: color, spotting, or sticky residue.
- Undersides and nodes: early pests often hide here.
- Soil surface: check for fungus gnat activity or salt crust.
- Reset and tidy
- Refresh top dressing (fine bark or pebbles) if messy.
- Straighten planters and stands for a clean, intentional look.
Daily 60-second glance
- Morning check: any dramatic wilting, dropped buds, or pests? Triage right away.
- If something seems “off,” adjust light first—most bloom issues trace back to light.
Monthly tune-up (10–15 minutes)
- Flush pots with plain water to rinse fertilizer salts.
- Evaluate potting mix structure; if it compacts or stays soggy, remix or repot.
- Deep clean trays and wipe shelves for a healthy, low-clutter display.
Calibration tips that save time
- Pot weight is the most consistent watering cue—practice lifting after a thorough soak to set a baseline.
- Group plants by watering schedule so entire clusters get watered together.
- For bud formation on blooming houseplants, prioritize bright indirect light and stable temps over extra fertilizer.
Seasonal adjustments
- Spring/Summer: Faster growth means more frequent watering and slightly more feeding.
- Fall/Winter: Shorter days slow growth—pull back on water and fertilizer, and move plants closer to light.
Toolkit to keep nearby
- Narrow-spout watering can, microfiber cloth, clean shears, moisture meter (optional), and a small tray for clippings.
Time of day matters
- Water and feed in the morning so foliage dries by night—healthier leaves, fewer fungal issues.
Secret 9: Prevent pests and issues in your flower plant home with airflow, hygiene, and timing
In indoor gardening, prevention is the easiest form of pest control. A few environmental tweaks keep insects and diseases from gaining a foothold.
Airflow that discourages problems
- Run a gentle fan on low for 15–30 minutes a couple of times a day in dense groupings.
- Space leaves so they don’t touch; aim for at least a finger’s width between plants.
- Avoid cold drafts—steady, mild airflow beats gusts.
Watering and humidity hygiene
- Let the top inch of soil dry between waterings (adjust by species) to deter fungus gnats and root rot.
- Bottom-water occasionally to rehydrate a dry, hydrophobic mix, then return to normal watering.
- Water the soil, not the leaves; if leaves get wet, blot or let them dry in morning light.
Clean tools, clean leaves
- Disinfect shears with 70% isopropyl alcohol before pruning each plant.
- Wipe leaves monthly with a damp cloth to remove dust and spores.
- Quarantine new plants for 7–14 days to prevent hitchhikers from spreading.
Early detection—catch it small
- Tap test: Hold white paper under a leaf and tap; tiny moving specks can signal mites.
- Look for cottony tufts (mealybugs), brown bumps (scale), webbing (spider mites), or sticky residue (sap-feeders).
- Use a small magnifier for a quick, reliable check.
Targeted responses (gentle first, repeat weekly 2–3 times)
- Spider mites: Rinse foliage in the shower, increase humidity, then apply insecticidal soap to leaf undersides.
- Mealybugs: Dab visible pests with 70% isopropyl alcohol on a cotton swab; follow with a light horticultural soap.
- Scale: Gently lift soft scale with a fingernail or cotton swab, then treat with horticultural oil.
- Fungus gnats: Let the top layer dry, add a layer of sand or perlite on the surface, and use yellow sticky traps near the soil.
Timing is everything
- Treat in the morning and keep plants out of direct sun until dry.
- Repeat treatments to break the pest life cycle; one-and-done rarely works.
When to escalate
- If an infestation spreads, isolate the plant immediately. Consider replacing severely affected plants to protect the rest of your collection.
- Always read and follow product labels, especially around kids and pets.
With a quick weekly rhythm and smart prevention, your flower plant home stays vibrant, healthy, and stress-free. Keep the light right, the potting mix breathable, and your routines short—and enjoy more color with less effort.
Conclusion:
Bringing it all together
Take a breath—you now have a clear roadmap for a flower plant home that doesn’t just look stunning, it stays that way. From mapping light zones to styling with intention and running a quick weekly routine, each secret builds a simple system you can actually maintain. Which step will you try first: refining light, upgrading potting mix, or giving your blooming houseplants a better spot?
Here’s the big idea: your flower plant home thrives when you match plants to the light you truly have, style with a few repeatable formulas, and commit to fast, consistent houseplant care. When light, airflow, soil, and routine work together, blooms last longer, foliage stays cleaner, and you spend more time enjoying your space than fixing it.
Your 7-day quick-start
- Map one corner: Identify bright indirect light versus lower-light spots and move your top bloomer accordingly.
- Refresh one pot: Repot with a breathable potting mix and confirm there’s a proper drainage hole.
- Set a vignette: Create a visual triangle—tall, medium, trailing—so your display reads as intentional, not cluttered.
- Run the 10-minute check: Water thoroughly (then drain), feed lightly, deadhead, and rotate for even growth.
- Prevent early: Improve airflow, wipe leaves, and practice gentle pest control before problems spread.
- Calibrate care: Lift pots to learn “dry vs. watered” weight; adjust frequency by season and room conditions.
- Review and repeat: If a plant stalls, adjust light first—most issues resolve when the placement is right.
Small habits, big impact
- Keep bloomers in bright indirect light; it fuels flowers without scorching leaves.
- Upgrade potting mix before adding more plants; roots drive everything you see above the soil line.
- Group by needs so watering is efficient and mess-free.
- Edit monthly: clear clutter, refresh top dressing, and reset your triangles.
Why this works
- Light drives energy; your routine directs it.
- A breathable setup below the surface protects roots, while quick, consistent houseplant care protects leaves and buds.
- Early, gentle pest control preserves momentum so your displays stay fresh without heavy interventions.
Ready for the fun part? Snap a photo of your current setup, make one small change today, and watch the space respond. Within a week, your flower plant home will feel calmer, brighter, and easier to maintain—because you designed it to be. And as your confidence grows, so will your collection of blooming houseplants that genuinely fit your life.
You’ve got the framework. Now build the rhythm. Your flower plant home is only a few small, smart steps away.
Dennis P. Hansen
Dennis P. Hansen is a home gardener with a genuine passion for plants and the simple pleasure of growing them. He enjoys caring for houseplants, succulents, and other plants at home while continually learning from everyday gardening experiences. Dennis likes to share practical plant care tips, useful observations, and simple solutions that can help others grow healthier plants. He believes that caring for plants is a rewarding journey and that there is always something new to learn along the way.