
Pilea Peperomioides Houseplant: 7 Proven Joyful Secrets


Hello, fellow plant enthusiasts! I am Dennis P. Hansen, and few indoor specimens bring as much effortless charm to a living space as the remarkable pilea peperomioides houseplant. With its coin-shaped peltate leaves, clean architectural silhouette, and joyful habit of producing baby plantlets around its base, this beloved botanical gem rewards thoughtful care. In this complete grower guide, you will master the proven cultivation rules, soil science, troubleshooting protocols, and propagation methods to keep your Pilea thriving for decades.
Table of Contents
- Understanding Pilea Peperomioides Houseplant Anatomy and Growth Habits
- Comprehensive Care Guide: Lighting, Watering, Soil, and Nutrients
- Pilea Peperomioides Houseplant Care & Culture Matrix
- Harvesting and Propagating Pilea Rhizome Pups
- Dennis’s Advanced Troubleshooting: Fixing Common Leaf Deformities
- Seasonal Adjustments for Spring, Summer, Autumn, and Winter
- Master FAQ: Common Questions on Pilea Peperomioides Houseplant
Understanding Pilea Peperomioides Houseplant Anatomy and Growth Habits
To cultivate the pilea peperomioides houseplant successfully, an indoor gardener must first appreciate its unique botanical anatomy. Originating from the mountainous slopes of Yunnan Province in southwestern China, where it grows in cool, shady subtropical forests upon damp limestone crevices, this member of the nettle family (Urticaceae) possesses distinct physiological adaptations. Its hallmark feature is its orbicular, peltate leaf blade—a circular leaf whose petiole attaches directly to the lower center of the blade rather than the margin. This central attachment allows the leaf to act like a miniature satellite dish, orienting its flat photosynthetic surface toward ambient sunlight with remarkable sensitivity.
Beneath the canopy of round green leaves runs a central succulent stem that thickens and lignifies as the plant matures. In young specimens, this stem remains tender, pale green, and upright. Over time, as lower leaves naturally senesce and drop, the stem develops a woody exterior, creating a sculptural, palm-like silhouette. Beneath the potting substrate lies a vigorous fibrous root system interwoven with subterranean stolons and rhizomes. These underground stems produce miniature adventitious buds that emerge through the soil surface as independent clonal offshoots, affectionately known by gardeners as “pups” or “pass-it-on” plantlets. According to botanical data from the North Carolina State Extension Plant Directory on Pilea Peperomioides, understanding this rhizomatous architecture is fundamental to managing container density and orchestrating successful plant division.
One of the most defining behavioral traits of the pilea peperomioides houseplant is strong phototropism. The petiole tissue contains specialized photoreceptors that detect directional light gradients. If a container sits in a static position near an east- or south-facing window, the petioles steadily stretch and twist toward the light source, pulling the entire plant canopy into an asymmetrical lean. Within three to four weeks, the side facing the room becomes sparse and bare, while the window-facing side crowds into a dense foliage cluster. Preventing this distorted posture requires an intentional rotation habit: turning the planter ninety degrees once or twice every week maintains a balanced, umbrella-shaped dome that showcases its architectural symmetry.

Comprehensive Care Guide: Lighting, Watering, Soil, and Nutrients
Caring for a pilea peperomioides houseplant is remarkably straightforward once you establish an environment that mirrors its native montane habitat. In our nursery benches and home display trials, plants thrive when provided with bright indirect illumination, porous substrate, rhythmic watering, and measured seasonal nutrients.
1. Light Exposure: Balancing Intensity and Solar Protection
Light is the primary metabolic throttle for your pilea peperomioides houseplant. These plants perform best in copious, bright, indirect daylight. An ideal placement is two to three feet back from a large south- or west-facing window protected by a sheer curtain, or positioned directly on the sill of an unobstructed east-facing window where gentle morning rays provide energetic photons without thermal distress. Direct, unshielded afternoon sun is hazardous; intense ultraviolet radiation overheats the fleshy circular leaf blades, destroying chlorophyll pigments and scorching bleached, crispy brown patches across the foliage. Conversely, deep shade triggers rapid decline. In low-light rooms, petioles elongate excessively into weak, floppy stems as the plant desperately reaches toward distant light, producing smaller, concave leaves with faded olive coloration. Authoritative indoor horticultural guidance from the University of Minnesota Extension on Houseplant Lighting confirms that providing 200 to 400 foot-candles of diffuse light sustains optimal cellular turgor and dark green pigmentation in tropical foliage.
2. The Drench-and-Dry Hydration Protocol
The succulent nature of Pilea petioles and leaves means they store a modest reservoir of moisture, making them far more resilient against temporary underwatering than saturated root zones. The most common error in indoor cultivation is chronic, frequent sipping—pouring small amounts of water into the pot every two or three days. This practice leaves upper soil damp while preventing oxygen from replenishing deeper roots. Instead, adopt Dennis Hansen’s strict “drench-and-dry” method. Allow the top two inches of potting medium to dry out completely between waterings. Insert your finger or an unvarnished wooden chopstick deep into the container; if moisture clings to the wood, defer watering for another two days. When irrigation is required, soak the potting soil thoroughly with room-temperature water until liquid flows freely from the drainage holes. Empty the drainage saucer after twenty minutes to prevent root-zone hypoxia. If your lower leaves ever begin yellowing prematurely, compare your irrigation cadence with our diagnostic guide on Why Are My Plant Leaves Turning Yellow: 7 Proven Fixes.
3. Aerated Soil Mechanics and Cation Exchange
Dense, moisture-retentive potting soils are disastrous for the pilea peperomioides houseplant. Standard garden dirt compacts into an airless brick, suffocating delicate root hairs and breeding anaerobic pathogens like Pythium and Phytophthora. Your potting medium must supply approximately twenty-five to thirty percent air-filled porosity. Dennis recommends creating a bespoke aroid-style substrate: blend forty percent premium peat moss or buffered coco coir, thirty percent coarse horticultural perlite or pumice, twenty percent fine orchid pine bark, and ten percent worm castings. The bark and perlite prevent compaction and create generous aeration channels, while coco coir retains clean moisture without waterlogging. For a comprehensive overview of substrate chemistry and DIY soil blending, review our cornerstone article on Chinese Money Plant Care: 7 Pro Rules for Bushy Pups to optimize your container root environment.
4. Container Sizing and Terracotta Advantages
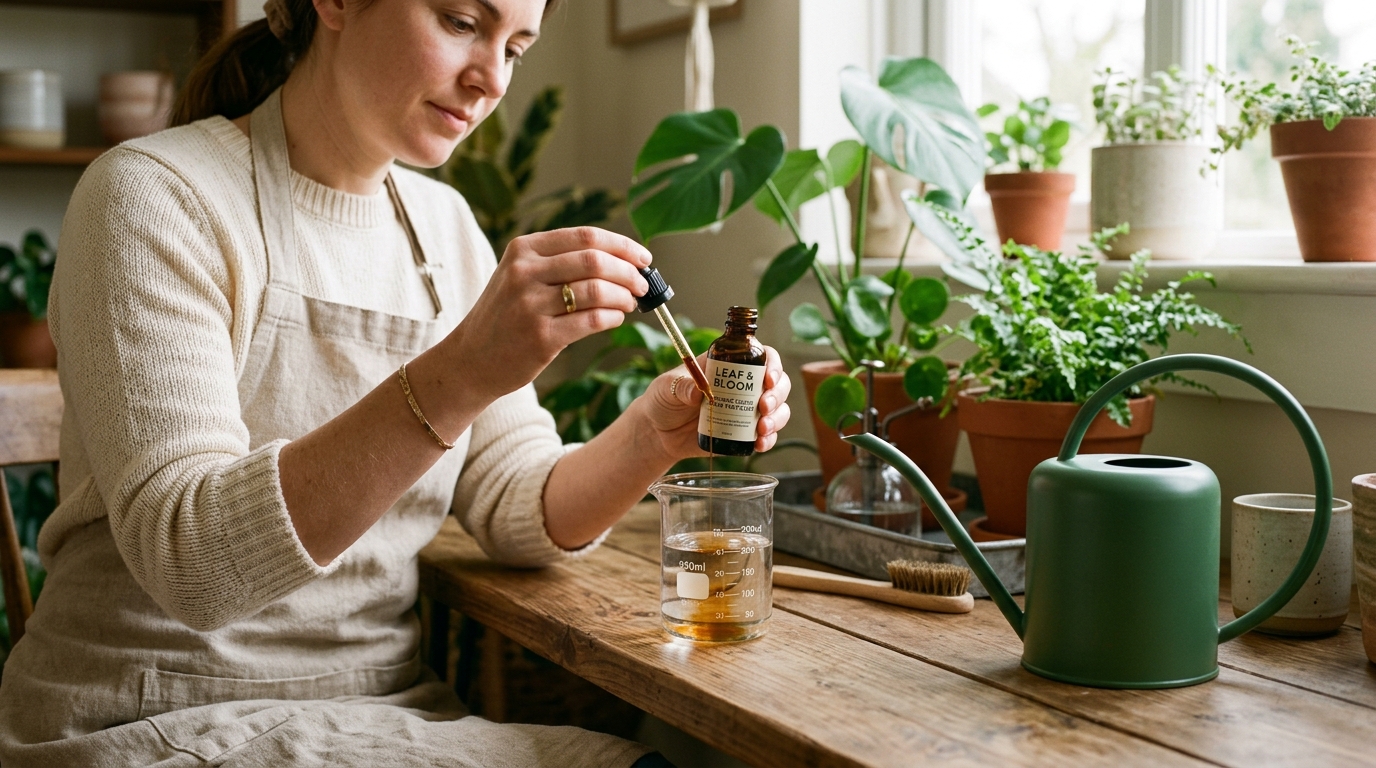
Pot material plays an active role in soil hydration dynamics. While glazed ceramic and plastic pots retain moisture for prolonged periods, unglazed terracotta planters are porous, allowing air and water vapor to transpire through the pot walls. For gardeners prone to accidental overwatering, unglazed terracotta acts as a vital safety buffer that dries out root balls evenly from all sides. When selecting container size, never move a Pilea into an oversized planter. An excessive volume of unoccupied soil retains surplus water that the root system cannot drink, leading to chronic moisture stagnation. Upgrade pot size by only one to two inches in diameter when roots visibly encircle the base and poke through the bottom drainage hole.
5. Balanced Feeding and Salt Prevention
During active spring and summer vegetative flushes, your pilea peperomioides houseplant requires modest supplemental nutrition to sustain new circular foliage and fuel basal pup formation. However, Pilea roots are sensitive to harsh synthetic fertilizer salts. Apply a balanced, water-soluble indoor plant fertilizer (such as an N-P-K 10-10-10 or 20-20-20 formulation) diluted to one-quarter or one-half of the manufacturer’s suggested strength once every two to three weeks. Always irrigate the plant with plain water beforehand; applying liquid fertilizer to dry soil scorches sensitive root tips and causes leaf edges to curl downward in distress. Consult our master handbook on How to Fertilize Indoor Plants: 7 Proven Feeding Rules to ensure your feeding schedule avoids mineral toxicity.
Pilea Peperomioides Houseplant Care & Culture Matrix
To provide an actionable, at-a-glance reference, Dennis Hansen has synthesized the primary cultural requirements for the pilea peperomioides houseplant into this structured environmental care matrix:
| Care Parameter | Ideal Target Range | Dennis’s Critical Grower Notes |
|---|---|---|
| Light Exposure | Bright, indirect sunlight (250–400 Foot-Candles) | Shield from scorching midday sun; rotate pot weekly to prevent asymmetrical phototropic leaning. |
| Irrigation Cadence | Top 2 inches dry; soak thoroughly | Never permit roots to stand in runoff saucer water; allow soil to dry between waterings. |
| Soil Substrate | Airy, chunky aroid mix (pH 6.0–6.8) | Incorporate 30% coarse perlite or pumice to guarantee rapid drainage and root oxygenation. |
| Temperature Range | 65°F to 78°F (18°C to 26°C) | Protect from cold winter window drafts and direct blasts from air conditioning vents. |
| Ambient Humidity | 45% to 65% Relative Humidity | Tolerates standard household humidity, but elevated humidity prevents curled, crispy margins. |
| Fertilization | Balanced 10-10-10 at 1/4 strength | Feed bi-weekly in spring/summer; suspend completely during late autumn and dark winter months. |
Harvesting and Propagating Pilea Rhizome Pups
One of the most rewarding aspects of keeping a pilea peperomioides houseplant is its prolific propagation potential. As an established mother plant matures, its subterranean stolons send up miniature plantlets around the container perimeter. In addition, adventitious plantlets occasionally sprout directly from the central stalk. Propagating these offsets is straightforward and boasts an exceptionally high success rate.

Step 1: Assessing Pup Maturity
Patience is essential when harvesting Pilea plantlets. Never harvest a pup when it has only produced two tiny leaves; miniature offsets lack the carbohydrate reserves to establish roots independently. Allow the baby plantlet to grow until it possesses at least four to five fully expanded circular leaves and reaches a height of two to three inches. At this stage, the pup has typically begun developing its own fine root system along the underground connector stem.
Step 2: Clean Surgical Separation
To separate the offset, gently brush aside the top inch of potting soil around the base of the plantlet until you expose the subterranean rhizome connecting the pup to the primary mother stalk. Sterilize a sharp craft knife, razor blade, or micro-pruning shears with isopropyl alcohol. Cut the connecting runner stem approximately one-half to one inch away from the pup’s base, ensuring that any existing independent root hairs remain attached to the baby plantlet. Never pull or rip plantlets out of the soil by hand, as mechanical tearing fractures vascular tissues and crushes emerging roots.
Step 3: Rooting in Water or Direct Soil Potting
If the harvested pup already possesses several robust, fibrous roots measuring an inch or more in length, you can pot it directly into a small two- or three-inch terracotta container filled with a light, damp perlite-rich potting mix. If the pup has minimal or no roots, root it in water first. Place the base of the plantlet in a small glass vial filled with room-temperature distilled or filtered water, ensuring the lower stem is submerged while keeping the circular leaf blades dry above the waterline. Place the vial in bright, indirect light. Within two to three weeks, healthy, snow-white secondary roots will emerge. Once the roots reach two inches long, transition the pup into soil.
Dennis’s Advanced Troubleshooting: Fixing Common Leaf Deformities
The foliage of the pilea peperomioides houseplant serves as an expressive barometer of environmental health. When light, water, nutrients, or humidity drift outside biological comfort zones, the leaves display distinct physiological symptoms. Here is Dennis Hansen’s systematic diagnostic guide to resolving common Pilea issues:
1. Downward Leaf Curling (“Domed Umbrella” Foliage)
What the symptom looks like: The circular leaf blades arch downward like miniature umbrellas or domes, losing their flat, coin-like appearance. The foliage feels thick and stiff, but the edges bend conspicuously downward toward the potting soil.
Possible cause: Insufficient light levels or mild chronic overwatering. When light levels are inadequate, the plant expands its cellular surface area on top of the leaf faster than the lower surface, causing the blade to cup downward. In other cases, soil that remains perpetually moist limits root transpiration, triggering osmotic pressure imbalances in petiole tissue.
How to identify the cause: Measure light intensity at the plant’s location. If the plant sits more than five feet away from a window or in a room with only north-facing light, light deprivation is the trigger. Next, check soil moisture: if the substrate feels wet more than seven days after watering, root oxygenation is compromised.
What to do: Relocate your Pilea closer to an east-facing window or introduce a full-spectrum LED grow light. Lengthen the interval between irrigations, ensuring the top two inches of substrate dry completely before watering.
How to prevent the problem: Maintain consistent diffuse lighting year-round and ensure your container utilizes open, chunky potting soil.
2. Upward Cupping or “Canoeing” of Leaf Margins
What the symptom looks like: The edges of the circular leaves curl upward, forming a concave bowl or canoe shape. In severe cases, the leaf margins may feel dry or develop slight yellow edges.
Possible cause: Excessive thermal heat, dry indoor air, or direct sun exposure. When ambient temperatures climb above 80°F (27°C) or relative humidity drops below 35%, leaves transpire moisture faster than roots can replace it. The leaf curls its margins upward to minimize surface exposure to dry airflow.
How to identify the cause: Check whether the plant is positioned near an active heating radiator, fireplace, or HVAC vent, or if hot afternoon sunlight strikes the foliage directly.
What to do: Move the plant away from heat registers and drafty air vents. Provide shielding from direct afternoon sun, and place a small evaporative humidifier nearby to raise humidity to 50%.
How to prevent the problem: Monitor seasonal temperature spikes and maintain stable microclimate conditions.
3. White Mineral Crystalline Dots Beneath Leaves
What the symptom looks like: Tiny, white crystalline granules appear uniformly across the underside of the leaves. Many gardeners mistake these white grains for pest eggs or powdery mildew.
Possible cause: Guttation and mineral transpiration. Pilea foliage contains microscopic stomata and specialized water-secreting pores called hydathodes. When watered with hard municipal tap water containing high levels of calcium, magnesium, carbonates, and fluorides, the plant expels surplus dissolved salts through these pores. As the water evaporates, harmless white mineral salts crystallize on the underside of the leaf.
How to identify the cause: Touch the white dots gently with a damp cloth; if they wipe away cleanly without leaving damaged leaf tissue or insect movement, they are mineral deposits.
What to do: Switch to watering with rainwater, distilled water, or reverse-osmosis water. Wipe the leaf undersides with a soft damp cloth to clean stomatal pores.
How to prevent the problem: Avoid heavy tap water and dilute synthetic fertilizers to prevent salt buildup.
4. Premature Lower Leaf Yellowing and Dropping
What the symptom looks like: The oldest leaves at the base of the central stalk gradually lose their green hue, turn pale yellow, and detach cleanly from the stem.
Possible cause: While shedding an occasional bottom leaf every month or two is a natural part of stalk lignification, multiple yellow leaves dropping simultaneously indicates overwatering, nitrogen depletion, or root hypoxia.
How to identify the cause: Check petiole turgor. If the yellow leaves are soft, yellow-brown, and the potting soil is soggy, root suffocation is occurring. If the soil is dry and new growth at the top is pale, nitrogen deficiency is likely.
What to do: If soil is waterlogged, unpot the plant to inspect the root ball. Trim black or mushy roots and repot into fresh airy mix. If roots are healthy and soil is well-drained, supply a quarter-strength balanced fertilizer during your next watering. According to disease diagnostic guidance from the University of Florida IFAS Extension, maintaining aerobic root environments is the single most effective barrier against vascular wilt pathogens.
How to prevent the problem: Adhere strictly to the drench-and-dry watering protocol.
5. Leggy, Stretched Stalks with Sparse Canopy
What the symptom looks like: The central stem grows tall and thin with wide gaps between leaf nodes, giving the plant a spindly, sparse appearance.
Possible cause: Etiolation caused by inadequate light. The plant expends all its energy elongating its stem in search of sunlight rather than producing dense, compact leaf nodes.
How to identify the cause: Measure internodal distance; healthy Pilea nodes are stacked tightly together within one-quarter inch of each other. Spacings of an inch or more confirm light starvation.
What to do: Relocate to an area with significantly brighter indirect daylight or install an LED grow lamp. To restore a compact habit, you can “behead” the leggy top section, root it in water, and allow the remaining lower stump to sprout fresh, dense lateral clusters.
How to prevent the problem: Ensure adequate light from the moment the plant enters your home.
Seasonal Adjustments for Spring, Summer, Autumn, and Winter
Indoor microclimates fluctuate with the progression of outdoor seasons. Tuning your care routines to match these natural light and temperature rhythms preserves health and prevents environmental shock.
Spring and Summer: The Active Growth Accelerator
From late March through August, longer daylight hours and warming temperatures spur vigorous metabolic activity. During this active period, check soil moisture every five to seven days, as warm air and active transpiration accelerate water consumption. Apply quarter-strength balanced liquid fertilizer every two to three weeks. Spring is also the ideal season for harvesting rooted pups and performing container repotting, as robust cellular vigor enables roots to mend rapidly from mechanical handling. Continue rotating the container twice weekly to build a symmetrical circular canopy.
Autumn and Winter: Conserving Energy and Light Management
As autumn arrives, the photoperiod contracts and sunlight intensity drops substantially. In response, your pilea peperomioides houseplant downshifts its growth rate. Because roots consume water at a fraction of their summer pace, extend your watering interval to every ten to fourteen days, ensuring the soil dries thoroughly. Suspend all fertilizer applications from October through February; unabsorbed nutrients during dark winter months accumulate in the soil as toxic mineral salts. Move the plant closer to the window glass to capture scarce winter photons, but ensure foliage does not physically touch cold window panes. Protect the container from heating vents and drafty doorways.
Master FAQ: Common Questions on Pilea Peperomioides Houseplant
How often should a pilea peperomioides houseplant be watered during active growth?
During the active spring and summer growing season, a pilea peperomioides houseplant typically requires watering once every seven to ten days, but you should never water strictly by a calendar schedule. Container volume, potting substrate porosity, ambient temperature, and light levels all dictate how fast moisture evaporates. Always assess the potting mix directly before watering by feeling the top two inches of substrate; it should feel completely dry and crumbly to the touch. When irrigating, provide a thorough, deep soaking until water flows freely from the drainage holes, ensuring the entire root ball hydrates evenly. Discard all runoff from the saucer after twenty minutes to prevent root-zone oxygen starvation. During winter, reduce watering frequency to every twelve to sixteen days.
Why are the leaves on my pilea peperomioides houseplant curling inward or outward?
Curling foliage on a pilea peperomioides houseplant is a physiological reaction to environmental stress, and the direction of the curl reveals the root cause. If the circular leaf blades cup downward into an umbrella-like dome, the plant is typically reacting to low light levels or chronic overwatering; the leaf expands its upper surface to maximize photon capture while dealing with sluggish root uptake. Conversely, if the leaf margins curl upward into a bowl or canoe shape, the plant is usually experiencing heat stress, low ambient humidity, or exposure to harsh direct sunlight. In response to dry heat, the plant cups its edges upward to shelter stomata and conserve transpiration moisture. Relocating your plant to bright, indirect light and stabilizing room humidity will gradually flatten new emerging foliage.
How do you safely separate and propagate pups from a pilea peperomioides houseplant?
To safely propagate pups from a pilea peperomioides houseplant, wait until the offset develops four to five mature leaves and reaches at least two to three inches in height. Gently brush away the top layer of potting mix around the plantlet’s base until you locate the underground rhizome connecting it to the mother stalk. Using a clean, sterilized razor blade or pruning shears, make a smooth cut through the runner stem approximately half an inch below the soil surface, preserving any delicate root hairs already growing from the pup. If the pup possesses healthy independent roots, pot it directly into a small container filled with a light, damp perlite mix. If rootless, place the pup’s stem in a small glass of distilled water for two to three weeks until roots reach two inches in length, then pot into soil.
What causes white crystalline dots beneath pilea peperomioides houseplant foliage?
The tiny white dots frequently observed on the underside of pilea peperomioides houseplant leaves are not pests, fungal infections, or diseases; they are harmless mineral crystals produced by natural guttation. Pilea foliage contains specialized microscopic pore structures called hydathodes that help regulate internal water pressure. When you water your plant with municipal tap water containing high levels of calcium, magnesium, sodium, or fluorides, the roots absorb these dissolved minerals along with moisture. The plant transpires excess water through its hydathodes, and as the droplets evaporate, the mineral salts crystallize on the lower leaf epidermis. While completely harmless to the plant, you can minimize these deposits by watering with filtered, rainwater, or distilled water and gently wiping leaf undersides with a damp cloth.
What is the optimal potting mix and container choice for a pilea peperomioides houseplant?
The optimal potting medium for a pilea peperomioides houseplant is a chunky, aerated, well-draining tropical blend that supplies both moisture retention and generous root oxygenation. A proven DIY recipe combines forty percent high-grade coco coir or peat moss, thirty percent coarse perlite or pumice, twenty percent fine orchid bark chips, and ten percent worm castings. This structure prevents substrate compaction and allows roots to breathe freely while maintaining a slightly acidic pH between 6.0 and 6.8. For container choice, unglazed terracotta pots with generous drainage holes are ideal, as their porous clay walls allow moisture to evaporate from all directions, safeguarding against root rot. Choose a container that comfortably accommodates the root ball with only one inch of surrounding space.
Dennis P. Hansen
Dennis P. Hansen is a home gardener with a genuine passion for plants and the simple pleasure of growing them. He enjoys caring for houseplants, succulents, and other plants at home while continually learning from everyday gardening experiences. Dennis likes to share practical plant care tips, useful observations, and simple solutions that can help others grow healthier plants. He believes that caring for plants is a rewarding journey and that there is always something new to learn along the way.